Thursday, April 18, 2013

#xplusalong bandwagon

I decided to jump on the #xplusalong bandwagon, especially after seeing this stunning quilt by Holly (bijoulovely).  I love how the bold colors of the Field Study line contrast with the black and white.  But, I don't have an Instagram (well I do, but I don't know how to use it), so I'll just post progress here and on Flickr.   

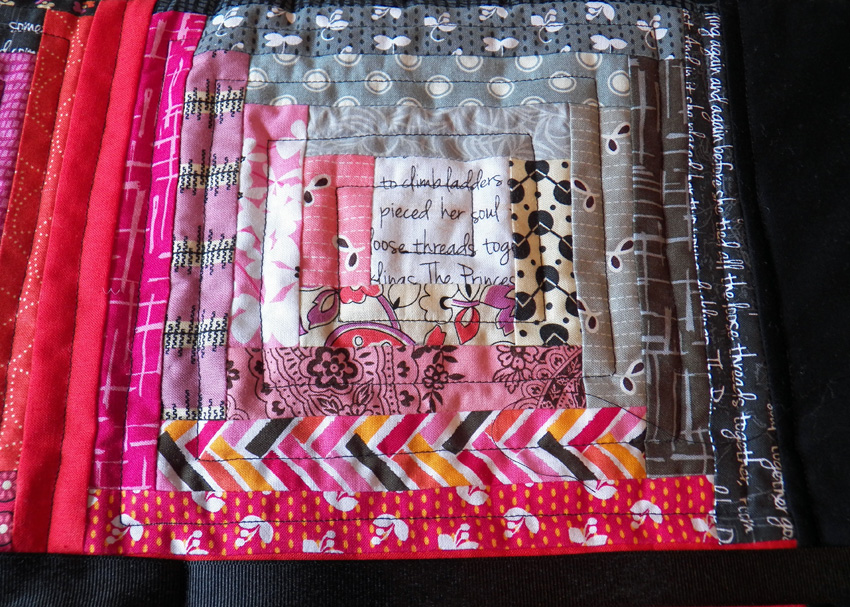
Here is my first block (ignore the untrimmed strings and the wrinkly table cloth).  It's really the only thing I have sewn since we're back from vacation, which is sad because we've been home for 2 weeks.


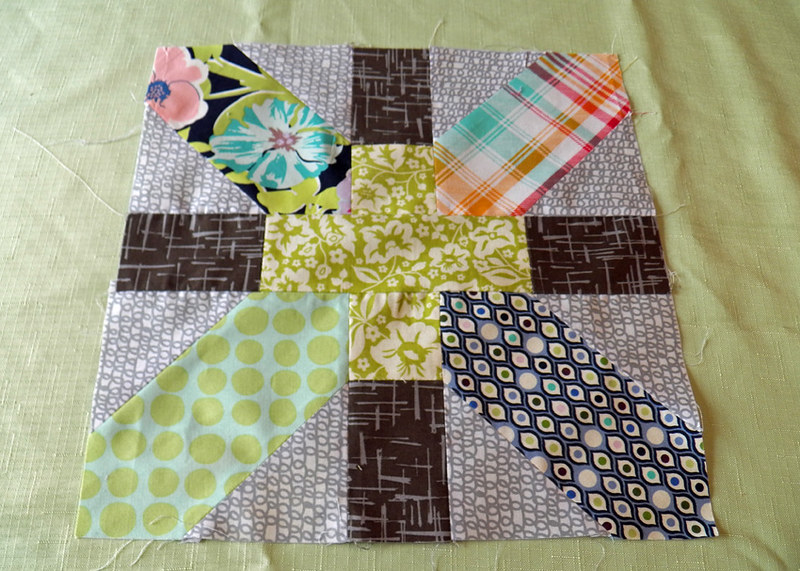
This block is made entirely out of scraps from a scrap pack I got from Hawthorne Threads, except for the black straw fabric.  I'm still not confident in my abilities so I don't really want to cut into more expensive stash fabric, plus the blocks are supposed to be scrappy.  The tutorial also calls for cutting the crosses on the bias... which I had no idea how to do until I made this block.  Horray for learning new things!

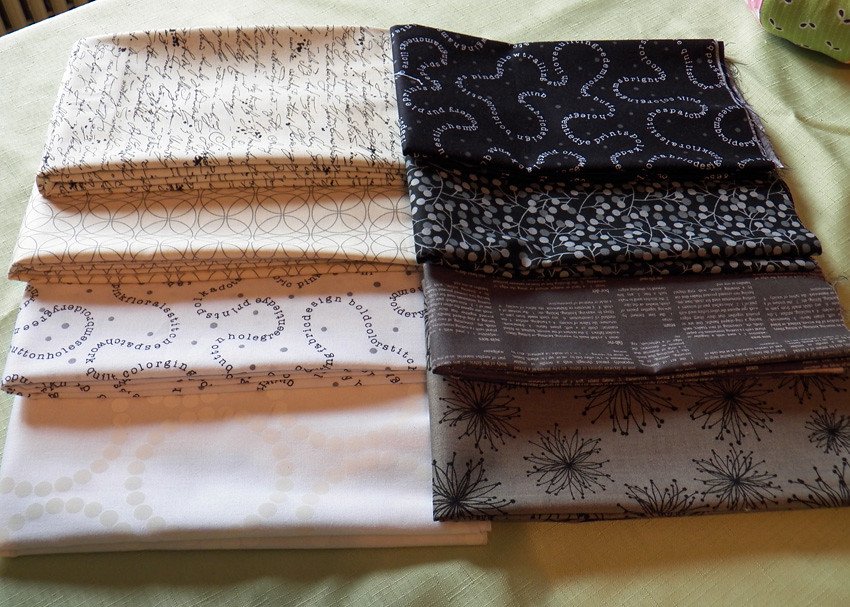
I don't have a ton of black and white in my stash, so I did splurge and buy some half yard cuts of black and white fabric to use.  I had been eyeing that library script fabric for a long time, but it was out of stock on Fabric.com, so when it came back in stock (and was on sale to boot) I had to scoop some up.


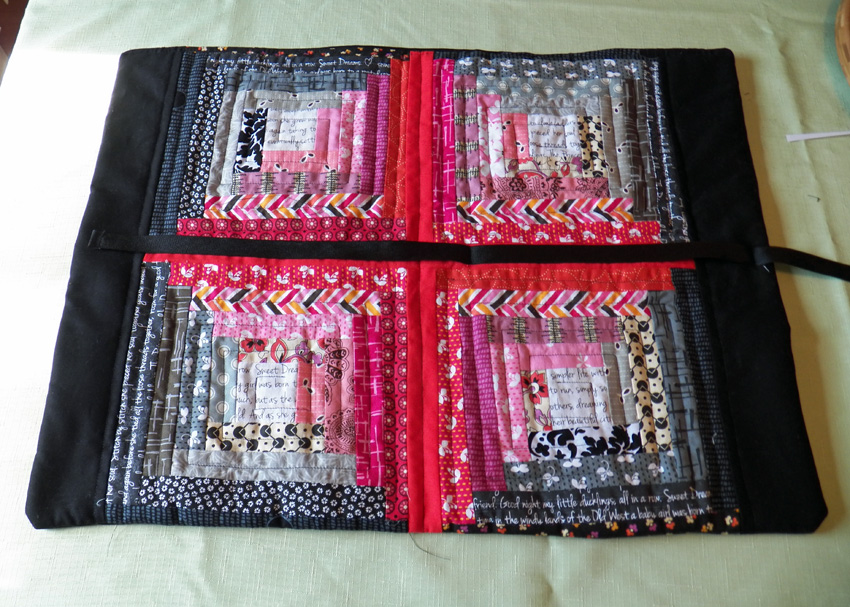
I'm thinking that my first attempt in scrappy fabrics will be a nice gift for my sister whose birthday is in October (at the rate I finish projects this will take me until October!).  These blocks are using the 12.5" modified cutting instructions, so it would take 7 blocks across and 8 blocks down to make a full sized quilt... not too bad considering every other block I've made so far has taken much more sewing and has a smaller finished size.  I'm afraid to actually quilt a full sized quilt on my dinky little Craigslist sewing machine, so I will probably use the quilt as you go method to get these blocks quilted.

If I decide to make another xplus quilt for myself, I would really love to use these fabrics from Pat Bravo's Indie line.  I have to actually finish a quilt though before I buy more fabric otherwise Ryan will be annoyed with me.  I feel like these fabrics would give the same bold look as Bijou Lovely's quilt without being a complete copy-cat.

I have some more things to post.  Maybe some vacation pictures once we go through the >1000 we took, so thanks for visiting!

Sunday, April 7, 2013

Knitting Needle Roll

I finally gave my dear friend, Val, her Christmas/birthday present this weekend. Late is better than never right?

I borrowed Modern Log Cabin Quilting from the library (my work!) with the intention to make the log cabin clutch. Instead I decided to use some of the log cabin blocks to make up the front of the knitting needle roll.  The quilts in this book are absolutely gorgeous, and the patterns and construction are really easy to follow.  Being a newbie quilter, I had no idea that there were so many ways to assemble a log cabin :)  Unfortunately, I had to borrow the book through our state-wide interlibrary loan system, so I don't have it in my possession anymore to do an in depth review.


This was my first real quilting project that I finished.  I started working on it in November, a month after teaching myself how to sew.  I got so overwhelmed and busy during the holidays that it got shelved until March when I finally sat down and finished it.  Val told me that her favorite colors are red, pink, and black so I decided to go with a gradient effect.

I used a very simple straight line stitch through the middle of each log for the quilting, and just about every grey, black, red, and pink fabric that I had in my stash at the time.

It's pretty huge, I think it turned out to be around 18"x24", probably overkill but I had no idea how big the log cabins were going to be when finished, I just cut strips and started sewing.

The border and the inside are made from a black twill that I got from the remnant bin at Joanns.  I figured a heavier fabric would be more durable than quilting cotton and would stand up to pokey knitting needles better.  To make the inside, I modified this tutorial at Made by Loulabelle to fit my dimensions.

All-in-all, I'm pleased with how it turned out.  Val says she has been getting so many complements on it when she goes to classes at her local knitting shop, and tells me I'd definitely be able to sell them.  With how much time I spent making it, I would have to charge like $200 for all my blood, sweat and tears, lol.  There was a lot of improvising on my part because I really had no clue what I was doing really.  I guess the best way to learn is still trial and error :)